When you first use PTFB Pro, all the macro and single-press items you create are held together in a single group, and the tab bar shown above is not displayed. However, you can create additional groups and split your items between them for easier management. Please read through the topics below for more information.
PTFB Pro shows the tab bar automatically when there is more than one group (tab), but you can make PTFB Pro show the tab bar even when there is only one group. To do so,
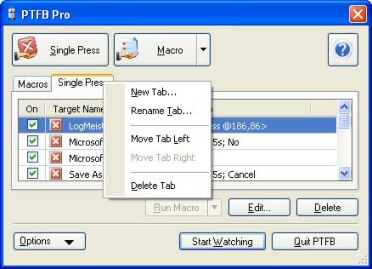
There are several ways to create a new group:
Whichever method you use, PTFB will ask you to choose a non-blank name for the new group.
To delete a group, right-click on the corresponding tab and choose "Delete Tab" from the resulting menu.
Some important points to note about deleting groups:
To rename a group, either:
Remember that you can't have a tab with a blank name!
Click on the tab in question, or use the keyboard shortcut CTRL + Tab to cycle through all tabs one at a time.
To change the tab order, right-click on a tab and choose either "Move Tab Left" or "Move Tab Right" to swap it with its neighbor.
You can use drag and drop to move one or more items from one group to another. Here's how, step-by-step:
This can only be done if you have turned off the "Sort List Automatically" option on the configuration screen (or on the popup menu displayed when you right-click on the list).
To re-order items within a group, just select the items in question and drag them to their new position.
First select all the items in the group, either using the shift-click method or by right-clicking on the list and choosing "Select All" from the resulting menu. Next, either hit the delete button or tap the space bar.